There are a few different ways to grant someone access to your YouTube channel, and it can get a little confusing. Below we detail exactly how you can add and remove managers from your channel, including new updates to Official Artist Channel permissions.
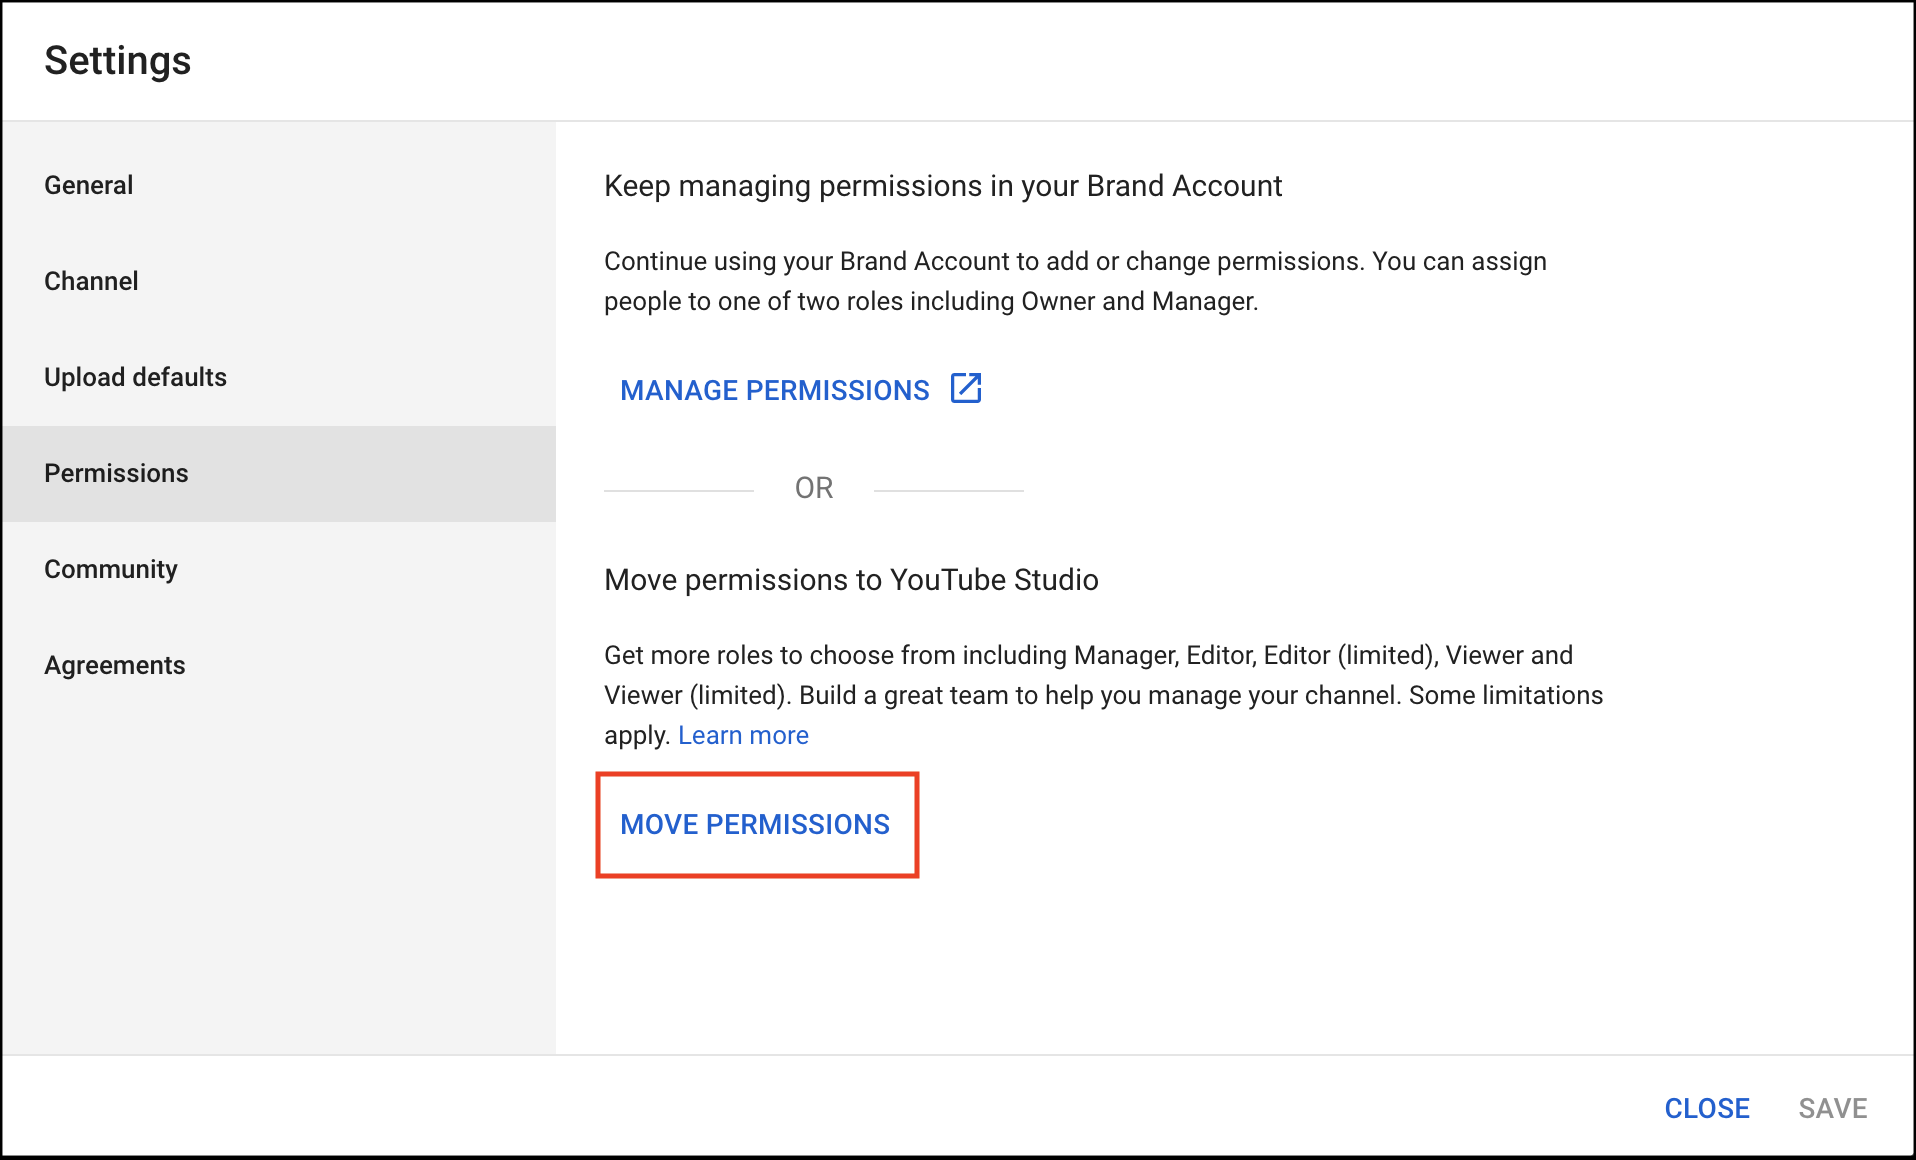
The main (and ideal) way to add and remove managers from your channel is via the Permissions feature within the settings of Youtube Studio. To get to the Permissions feature, just login to your YouTube account with the primary email address, then click “Settings” in the left-hand side menu (next to the gear icon). Then a pop-up will appear with the “Permissions” option on the left.

If your channel is not associated with a brand account, then you can click the “INVITE” button in the top right, and begin inviting users to have access to your channel.
If your channel is associated with a brand account, you’ll first need to opt-in to the Permissions feature and click “MOVE PERMISSIONS”. There, you will have the option to re-invite the users who previously had access to the channel via the Brand Account, and assign them new roles via Permissions.

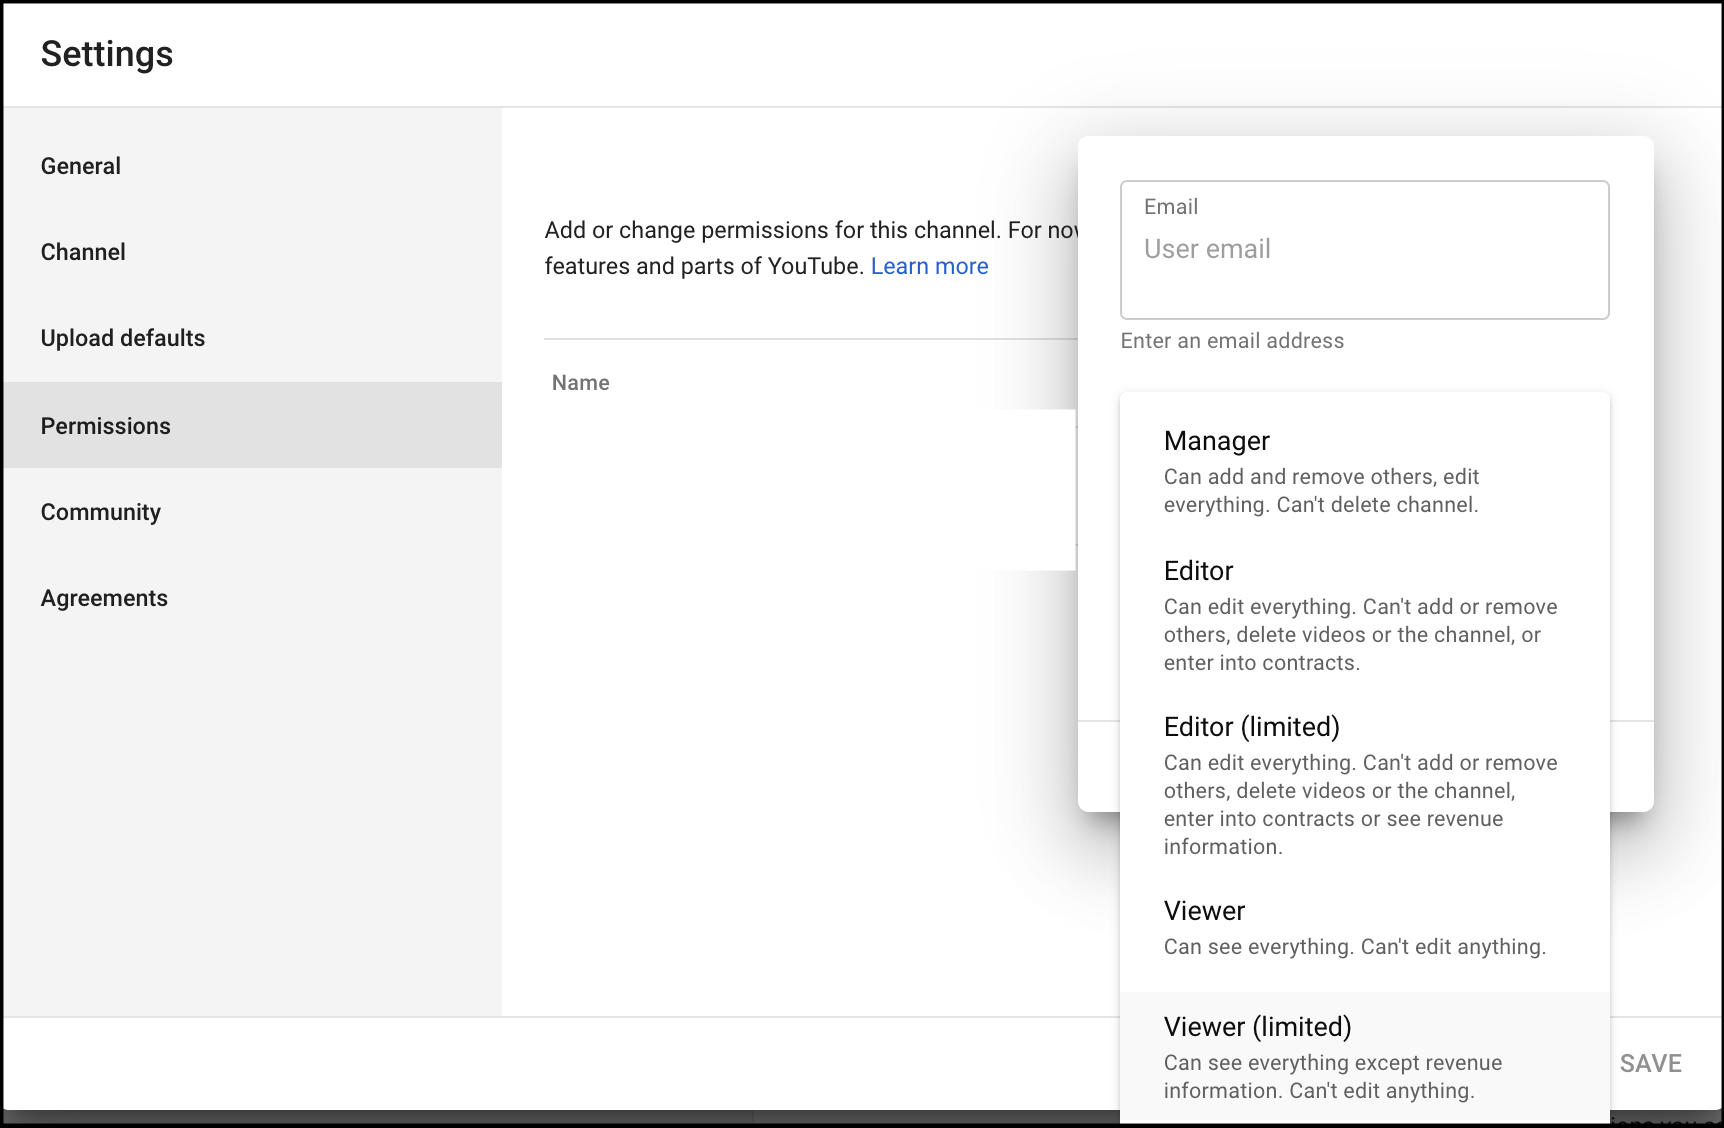
Whether you are inviting new users, or re-inviting previous users from a brand account, you will have 5 different roles that you can assign a user via Permissions. These roles are: Manager, Editor, Editor (limited), Viewer, and Viewer (limited).

It's important to note that if you are moving roles from a Brand Account to the Permissions feature, there are a number of features not yet available to roles from Permissions. These include: live streaming as the channel, mobile uploads, posting in Community, as well as no access to the Studio Mobile app. For a full breakdown of the roles and differences between Permissions roles and Brand Account roles, you can visit this link: https://support.google.com/youtube/answer/9367690#channelpermissions
As always, please reach out to with any questions regarding adding or removing managers from your YouTube channel.


