With live streaming becoming an essential tool to help grow your YouTube channel and stay connected with your fans, we wanted to put together a comprehensive guide to go live on the platform. This guide will help make sure you have the necessary setup and knowledge for going live, as well as provide some best practices for live streaming on YouTube. Continue reading for more details.
This guide is meant for live streaming from a computer, but you can check out our mobile live streaming guide here. The information in this guide is taken from YouTube’s recent live production checklist, which you can check out in full here.
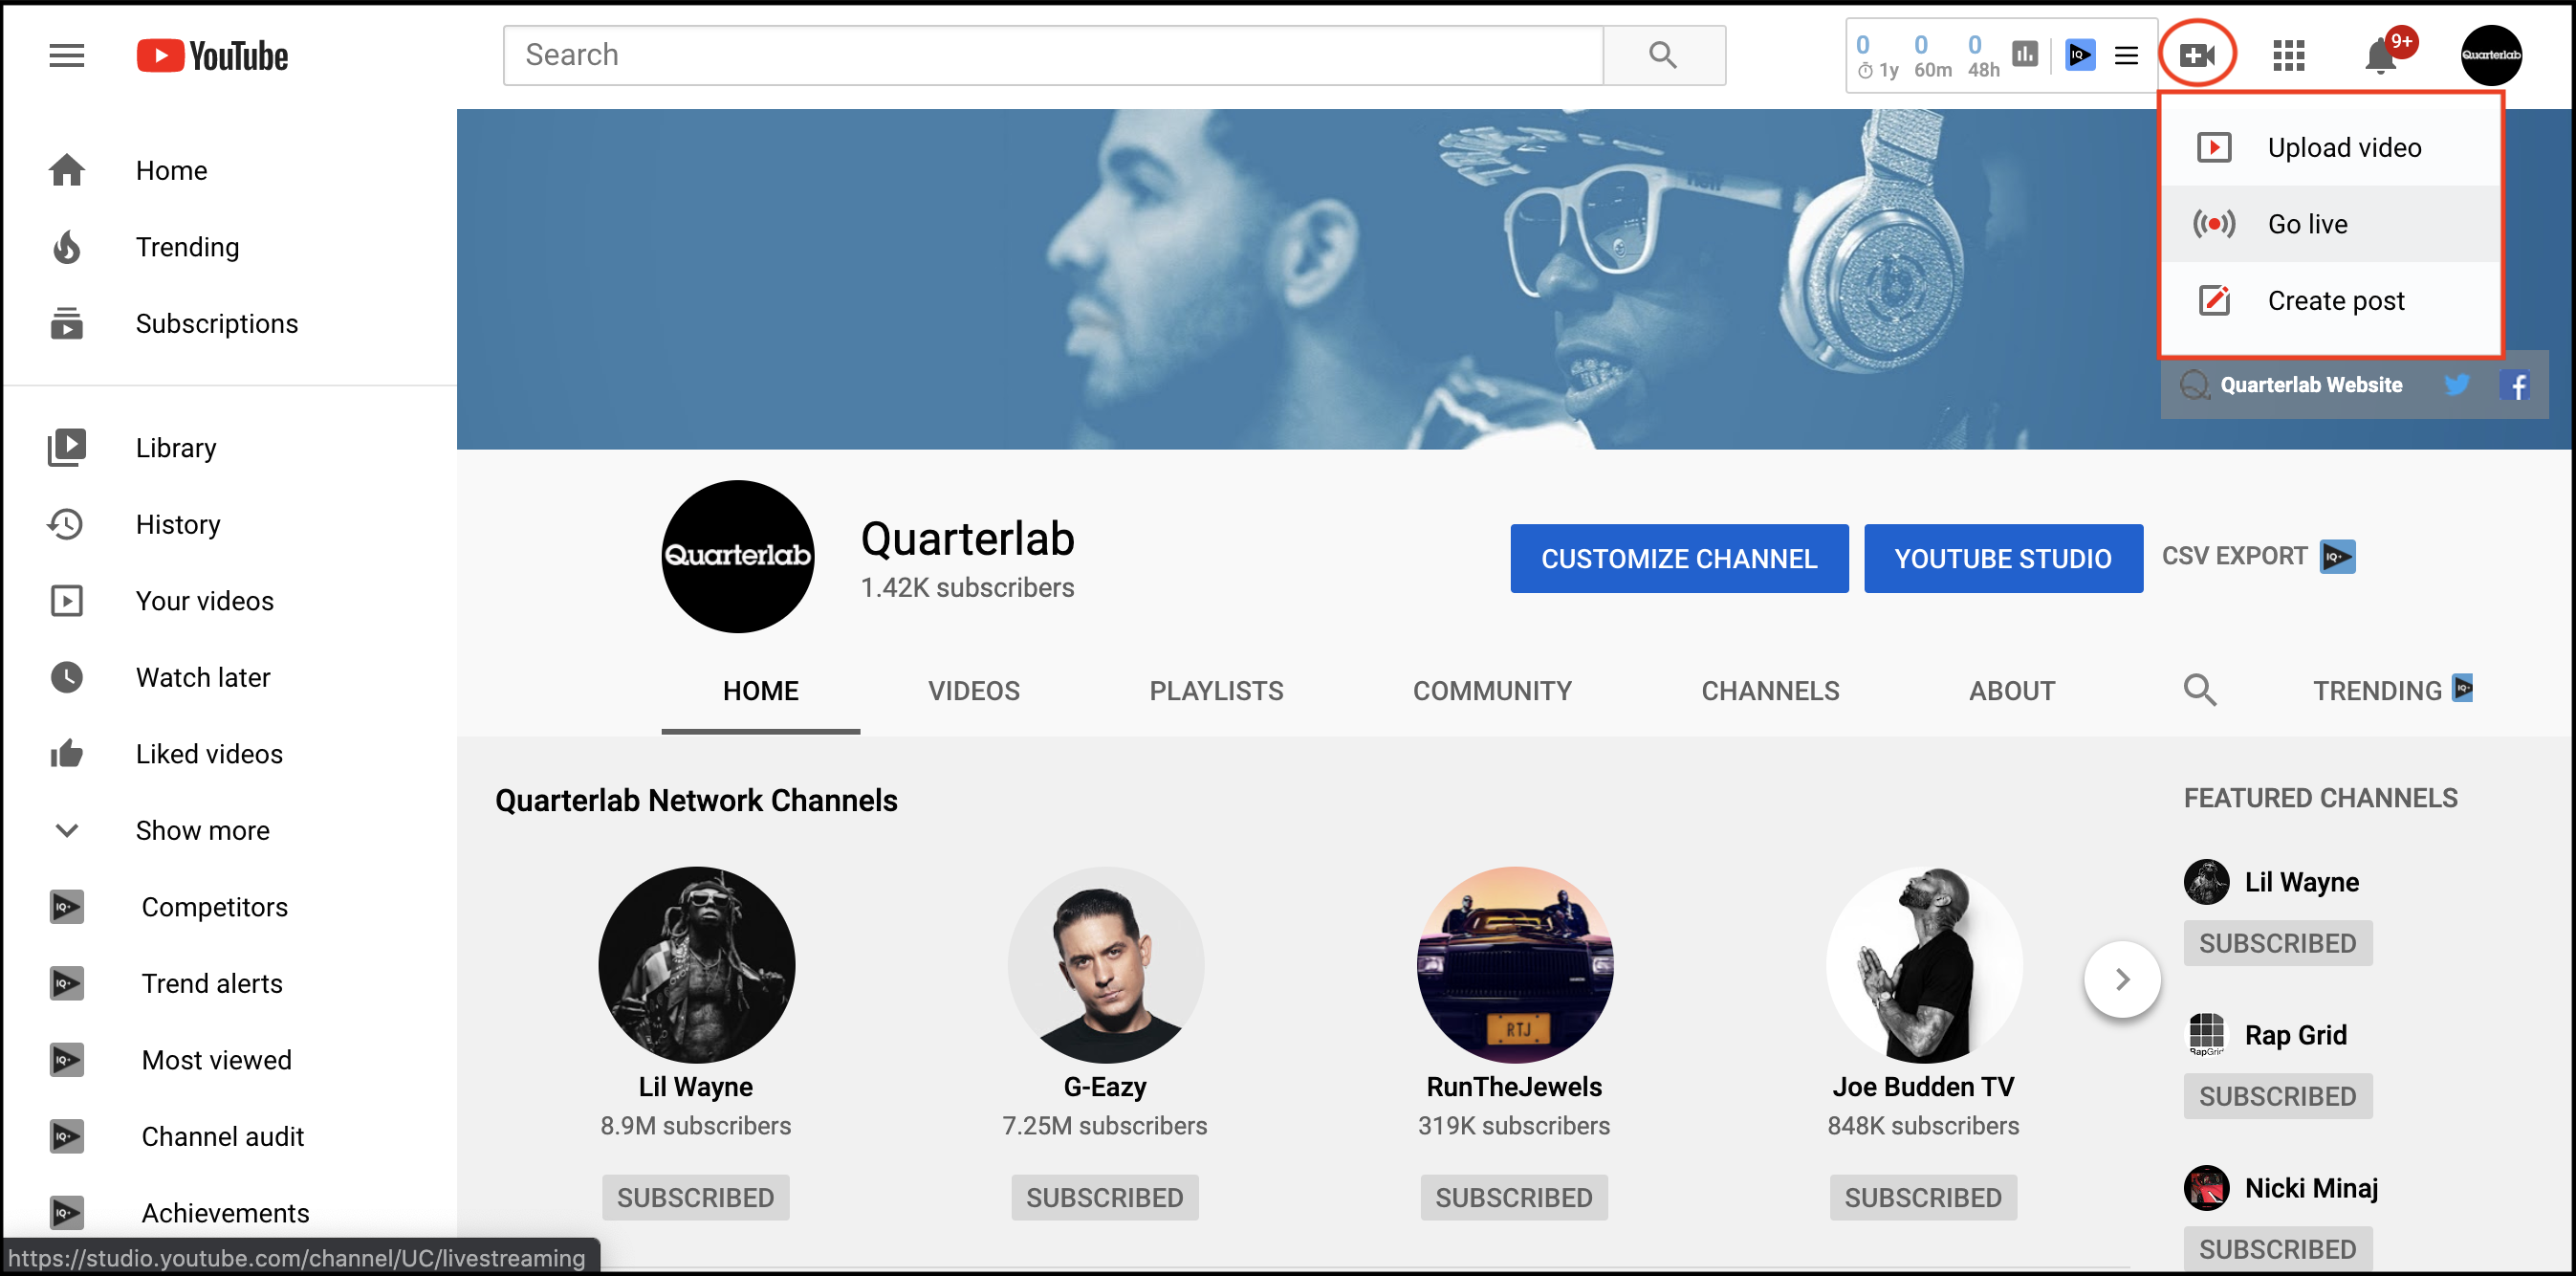
The first step in setting up a live production setup is to make sure your channel is ready to host. Confirm that your channel is verified and that you have no live stream restrictions in the last 90 days. To enable live streaming on your channel, you’ll need to first go to youtube.com and sign into your account. Then select the camera button at the top right corner and select GO LIVE.

After that, you’ll need to grant permissions for the YouTube app to access the camera, mic, and storage. If this is your first time live streaming, then you’ll receive a prompt stating that YouTube is verifying your account for live streaming access. This process can take up to 24 hours, so make sure to plan accordingly so you can go live when you want to.
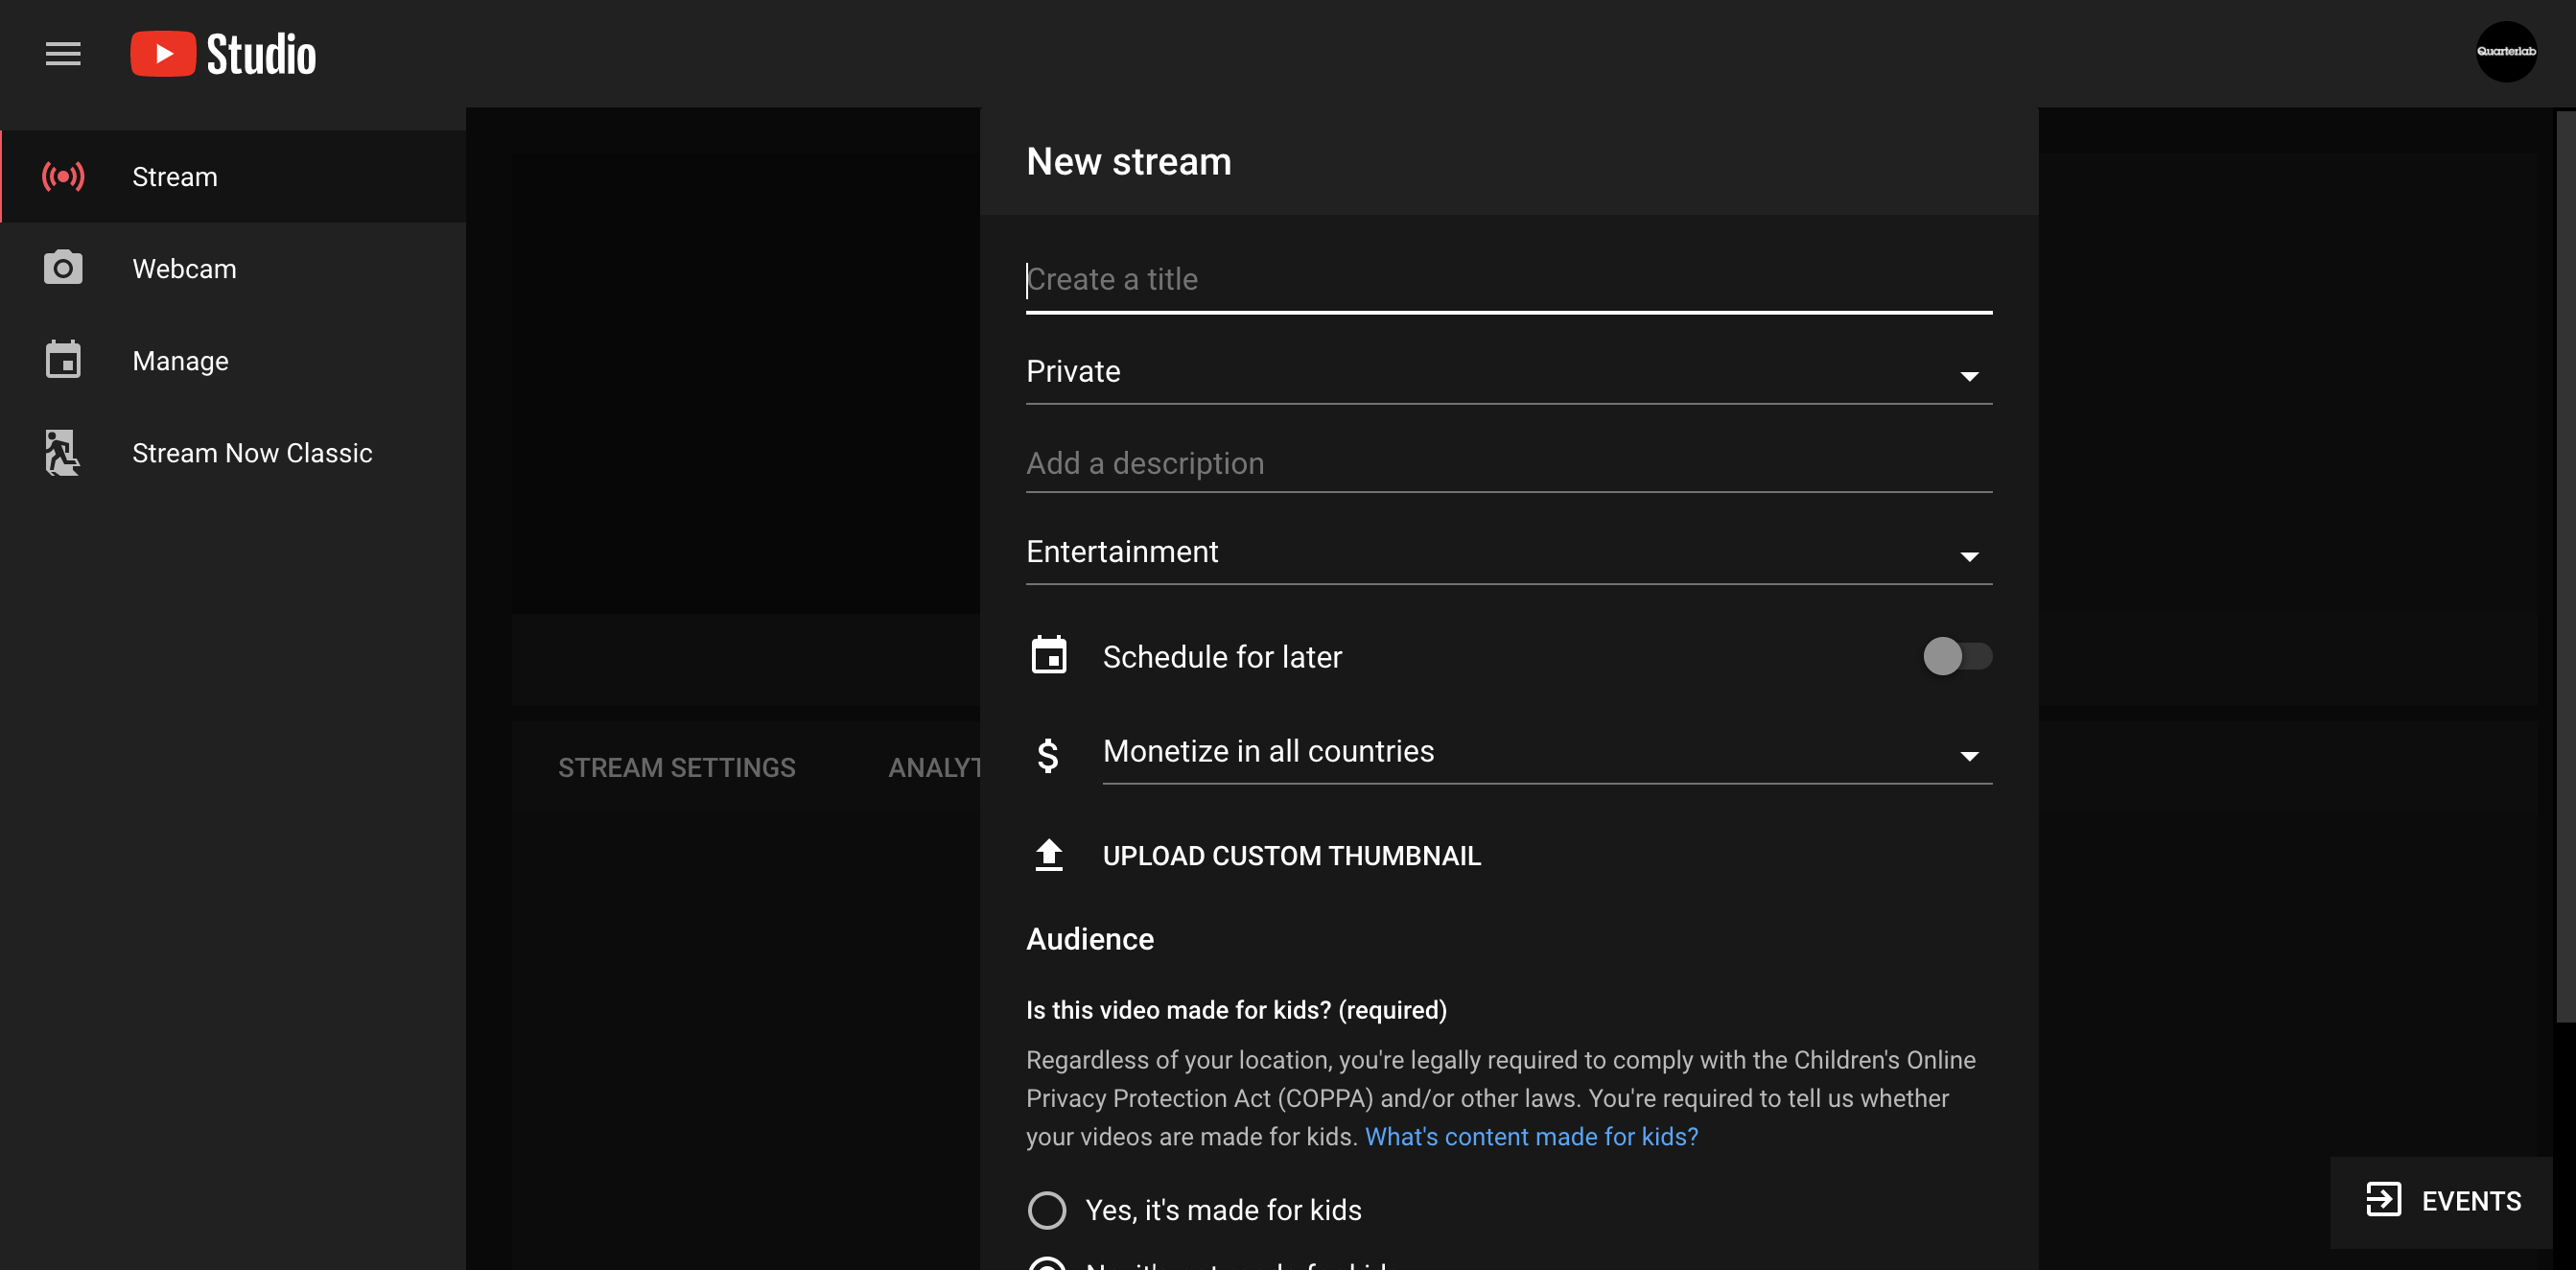
Once you have your account verified and live stream enabled, you can click GO LIVE again, you’ll be taken to the live control room (more info on that at our blog here). Once you're in the live control room, at the top or left, select STREAM and you’ll then be redirected to enter in the livestream title, description, and select a privacy setting. You’ll also be able to add a custom thumbnail in this section (1280 x 720 pixels), schedule your live stream for a later date, and enable monetization. Once done, hit SAVE.

If you’re using an encoder (optional), then you’ll want to make sure your encoder is set up before going live. You’ll also need to copy & paste your streak key into your encoder, and you’ll need to start your encoder first, which will create a stream preview in your live control room to make sure the stream is healthy (note: the public still can't see your live stream yet at this point, so feel free to test your stream and monitor it for any audio/video issues).
Once you are ready to begin the live stream, click GO LIVE on the right hand side of the live control room and then you are live and your fans can watch the stream! To end the stream, click END STREAM. To manage your live streams you can go back to YouTube Studio, click into VIDEOS, click the LIVE tab, and you’ll be able to manage your previous and upcoming live streams.
Best Practices for Live Productions:
- Before:
- Promote live stream in advance on socials, including YouTube Community and remind fans to tune-in. Include the live stream URL in all social posts. Try using a poll to grow fan interest in the songs to be performed.
- Encourage fans to click “Set Reminder” on the live stream so that they are notified when you are about to go live.
- Begin chatting before the stream goes live to engage with fans and get them engaged for tune in.
- Consider the length of your live stream. YouTube supports long-form livestreams and any live-streams up to 12 hours long will automatically be turned into video-on-demand on your channel. Anything longer than 12 hours should be recorded by your team for manual upload to the channel. If you’re doing a short-form live stream on another app, consider pushing fans to YouTube for the full content
- During:
- Use all socials to drive viewers to the Live Stream and include the direct URL link.
- Encourage affiliated artists (if applicable) to cross-promote on socials.
- Use live chat to speak directly with fans, answer their questions, and get them excited about the event taking place.
- Monitor live chat for any issues, and flag them to your YouTube team.
- After:
- Your live stream will immediately be available for on-demand viewing. Be sure to: Include any relevant infocards or end screens on the video & include the live stream in relevant playlists on your channel.
- Put all live streams in a “Live Archives” shelf on your channel for repeat and VOD viewing.
- Spotlight fan content about the live stream and event in your playlists and community posts.
- Update tags, description, and any other relevant information.
- Review analytics to learn for next time: Focus on view-thru-rate, points where viewers drop off, number of comments, and number of concurrent streams.
Be sure to reach out to us with any questions about live streaming on YouTube!


